How to make statements with invoice history for customers
Learn how to create a customer statement for the last 1 year on Bookipi Invoice mobile app with these easy steps:
How to create a customer statement for the last 1 year
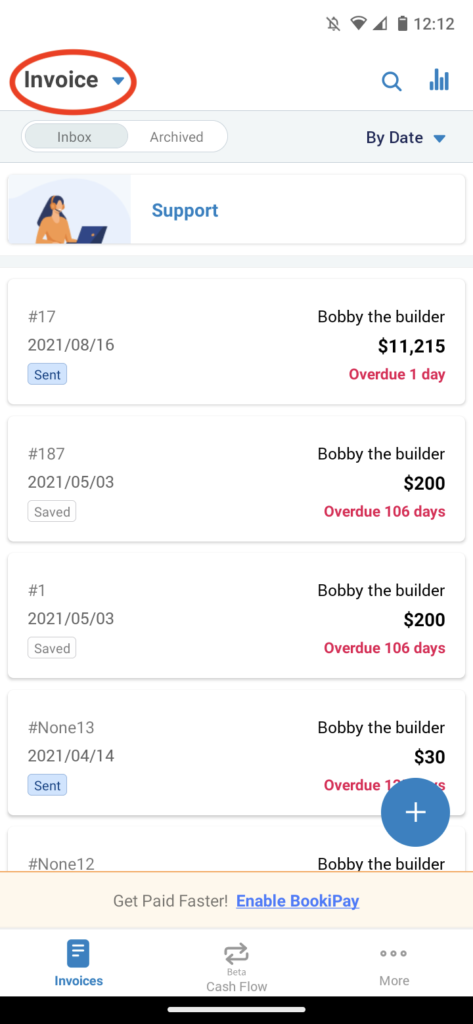
Step 1: Select ‘Invoice’
Select ‘Invoice’
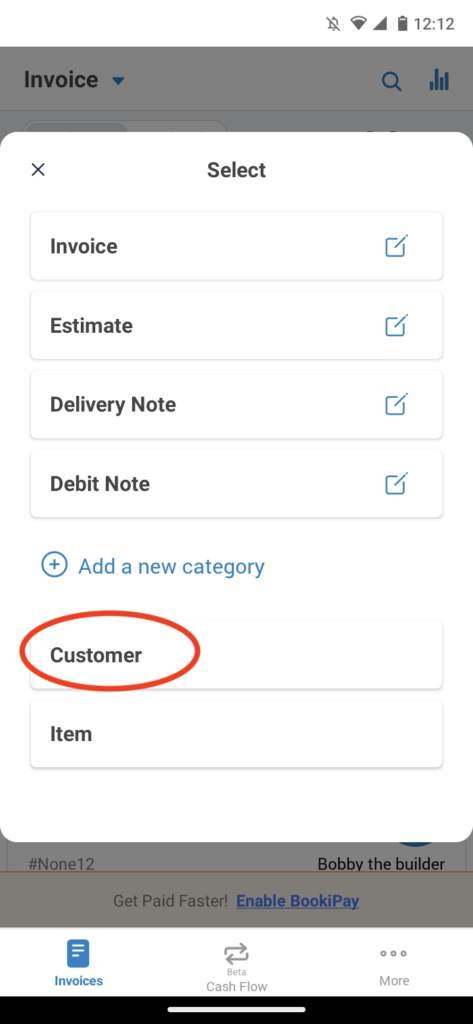
Step 2: Select ‘Customer’
Select ‘Customer’
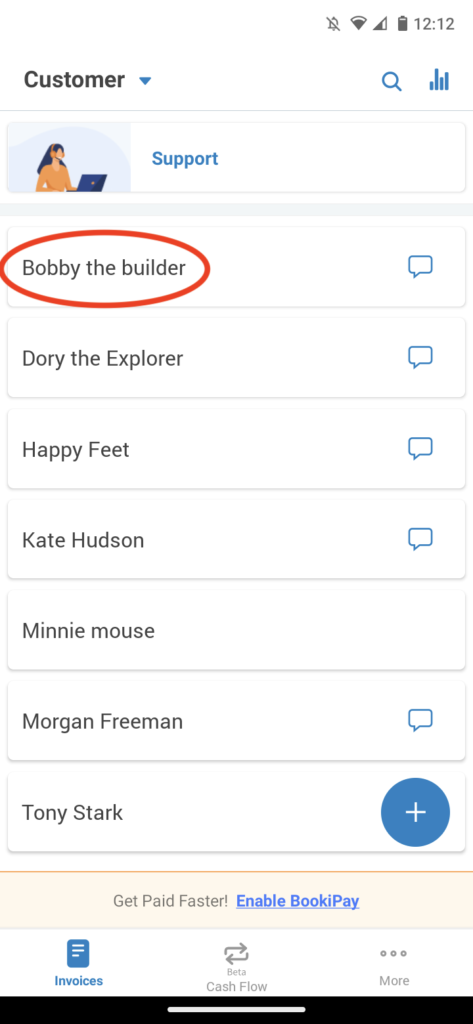
Step 3: Select the customer
Select the customer you would like to view the statement for
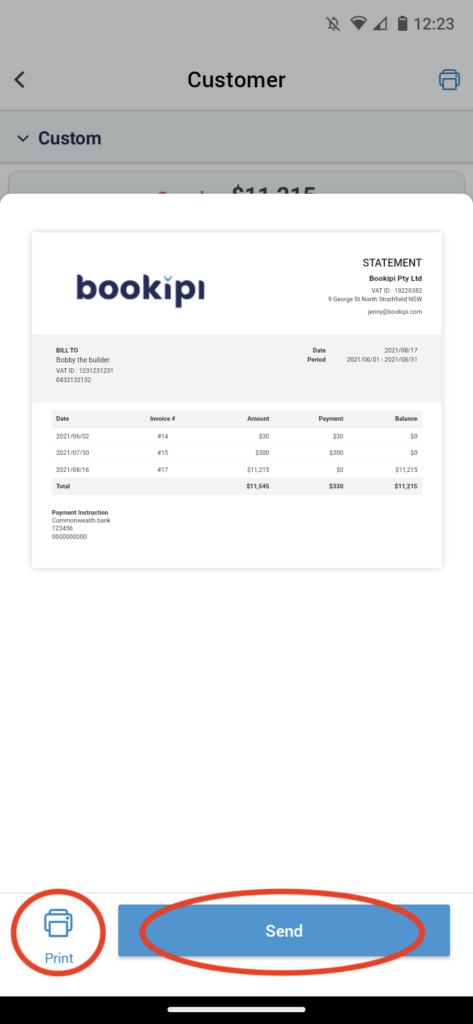
Step 4: Export the document/s
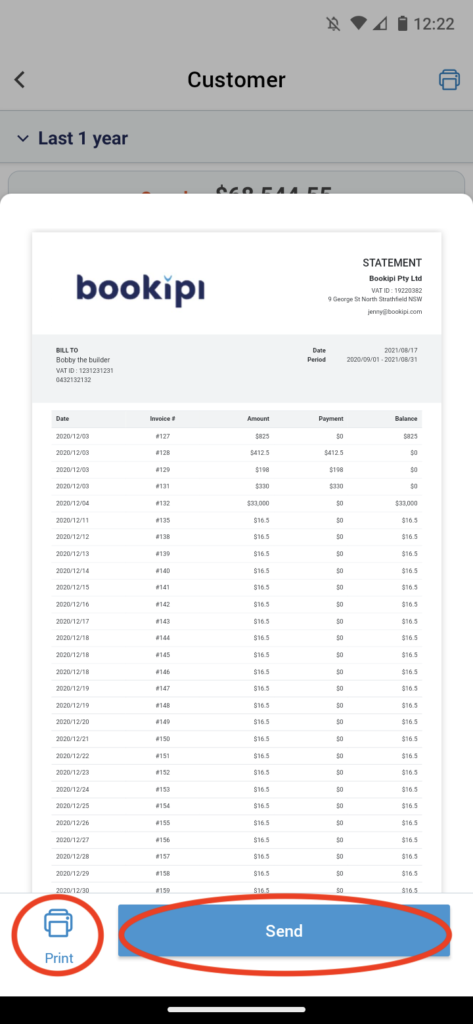
You will see all documents created for your selected customer in the last year. Select the Print icon on the top right.
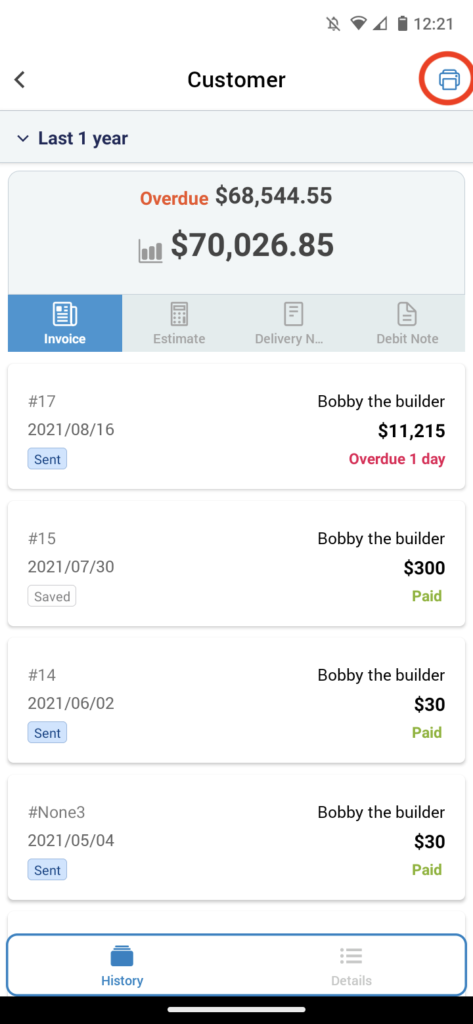
Step 5: Select ‘Print’, to download a copy to your phone OR send a copy to your customer by clicking ‘Send’
How to generate a customer statement for a custom period
Learn how to create a customer statement for specific dates by customizing the time period on Bookipi Invoice mobile app. Follow the steps below:
Step 1: Select ‘Invoice’
Step 2: Select ‘Customer’
Step 3: Select the customer you would like to view the statement for
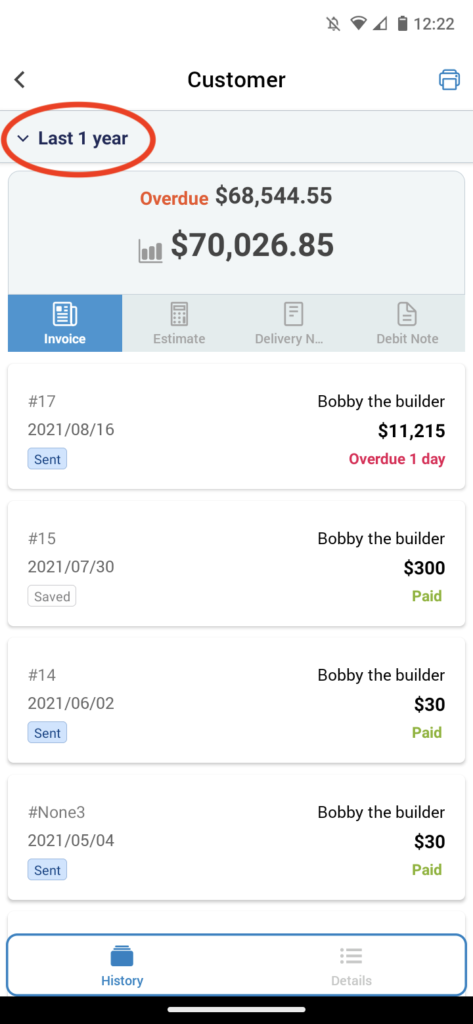
Step 4: See all documents created for your selected customer in the last year.
Select ‘Last 1 year’ from the Customer’s statement page.
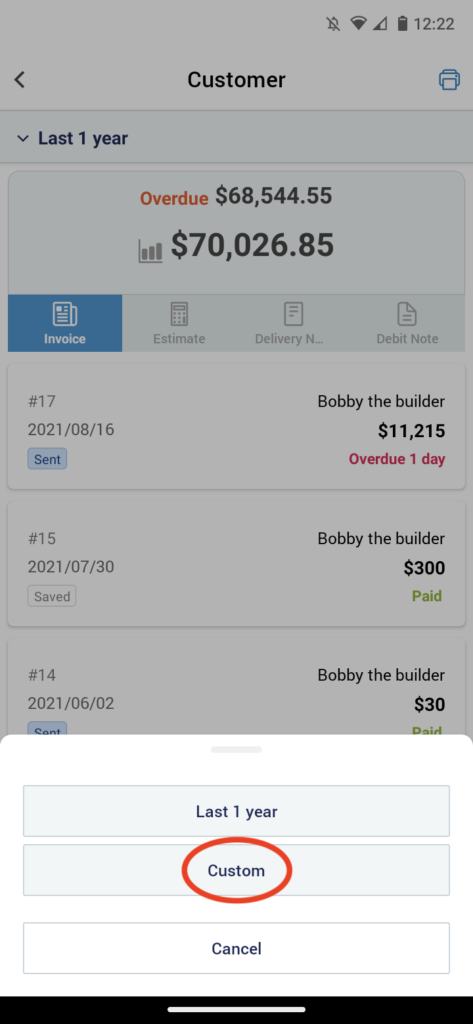
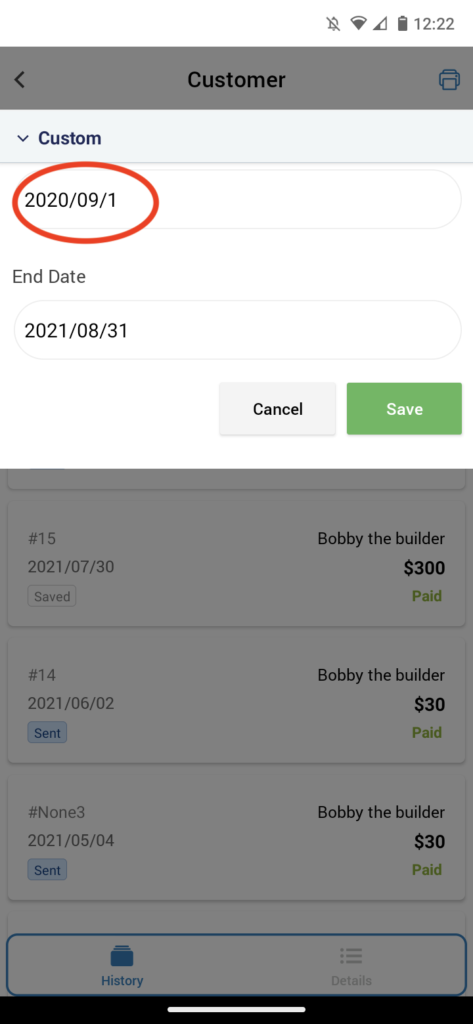
Step 5: Select ‘Custom’
Step 6: Select the ‘Start Date’ or ‘End Date’ to customize
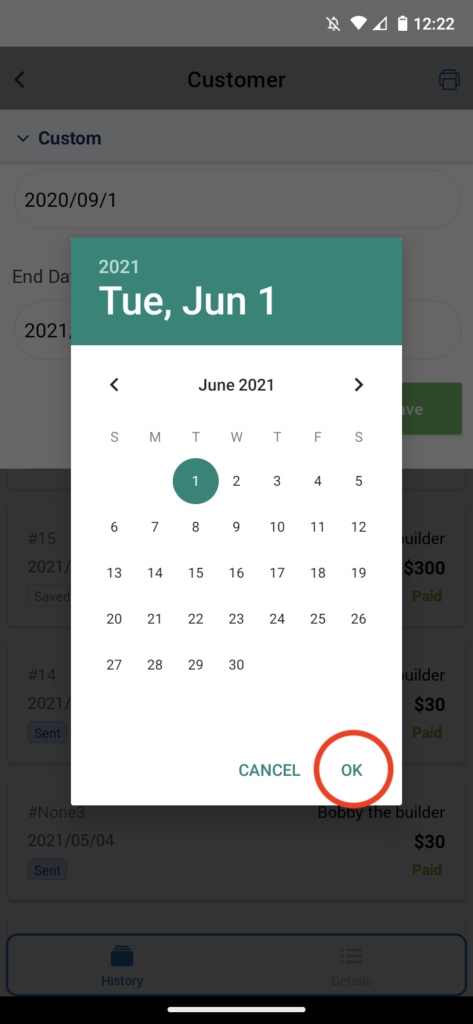
Step 7: Select the date on the calendar.
Then, click ‘Ok‘.
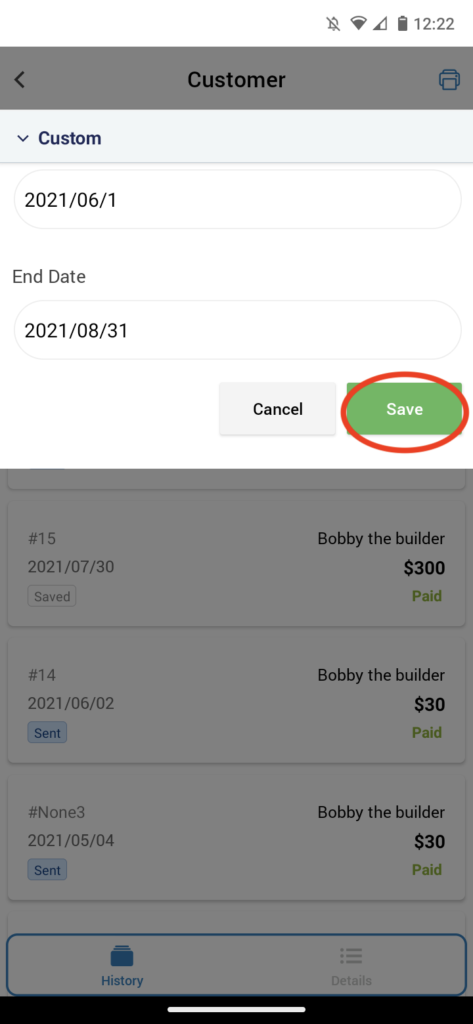
Step 8: Click ‘Save’
Once you are happy with the dates, click ‘Save’
Step 9: Select the Print icon.
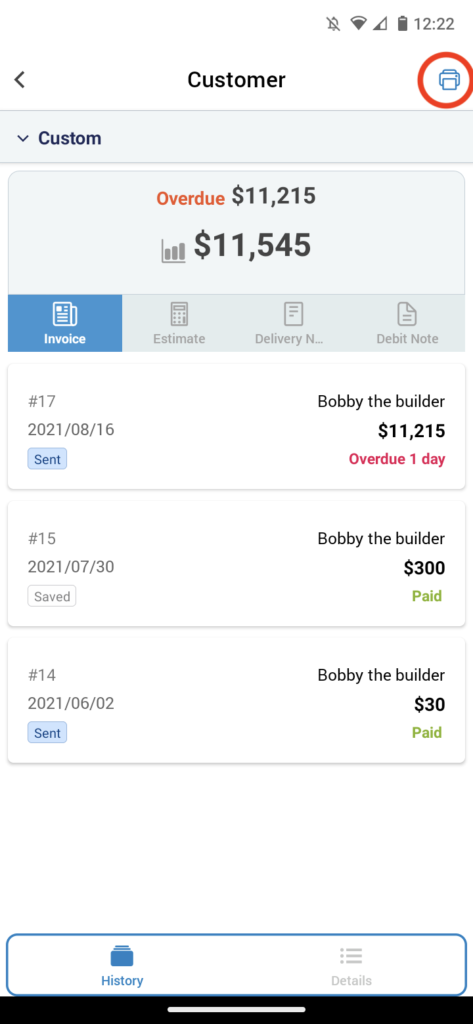
Step 10: Select ‘Print’ to print or download a PDF copy.
Alternatively, select ‘Send’ to email your customer a PDF statement.