Learn how to create, send, edit and filter invoices on Bookipi Invoice Web v2. The kind of information you need on an invoice may differ, check out our guides on what is an invoice or how to make an invoice of your own. In this guide you will learn:
Steps to make invoices in Bookipi web app
Step 1: Sign in to Bookipi Web v2
Sign up or log in to Bookipi web app
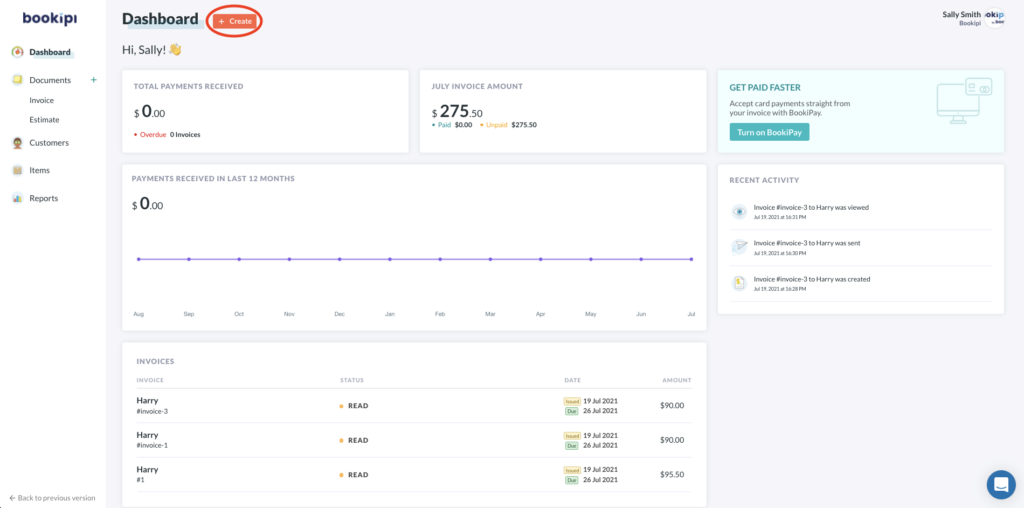
Step 2: Select '+Create'
Then, select ‘+Invoice‘
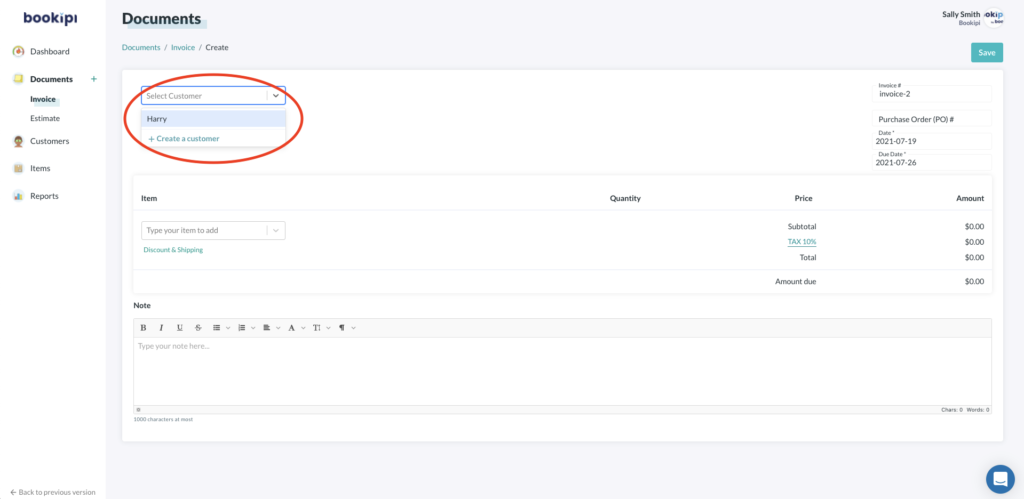
Step 3: Add a Customer
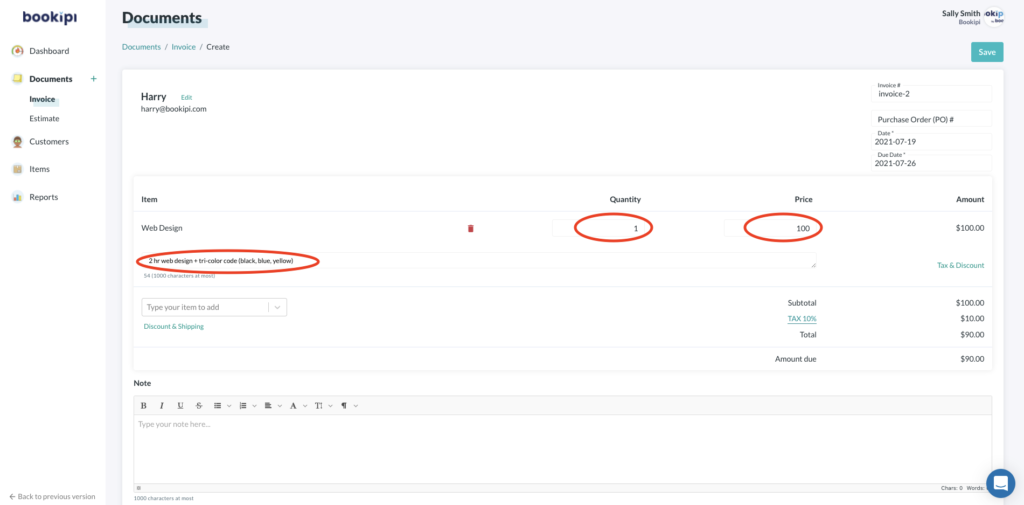
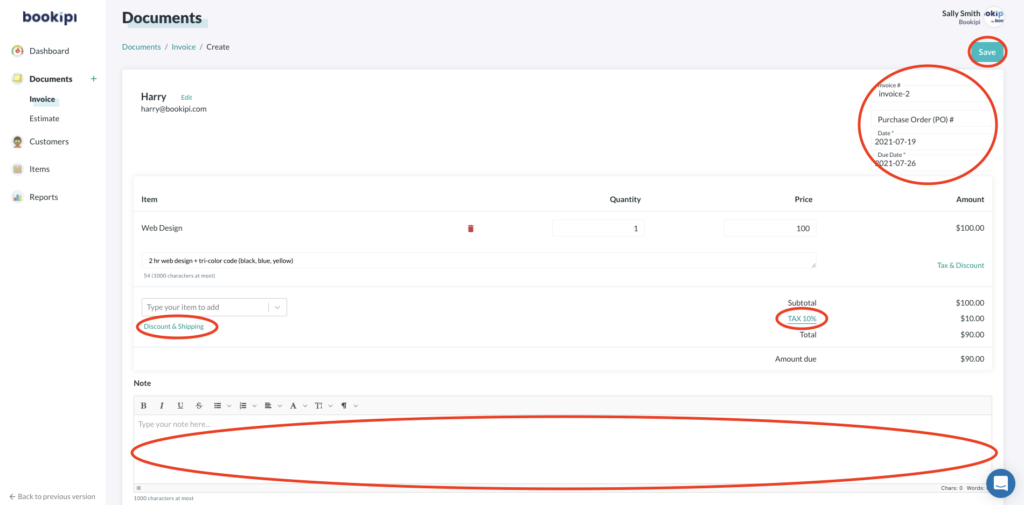
Step 4: Add an invoice Item.
Add the details of invoice Item/s.

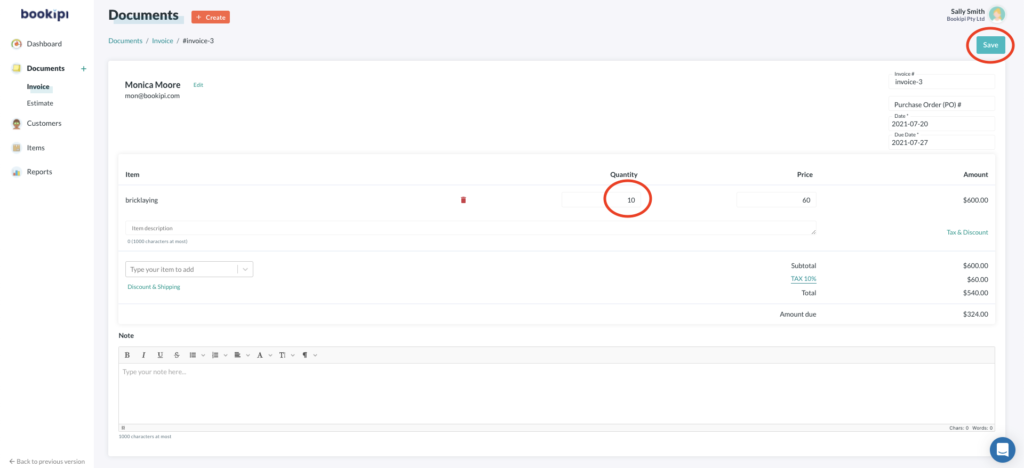
Step 5: Edit the quantity and price of invoice items
You can also add notes to your invoice.
Step 6 (Optional): Customize other option
You can also edit other details including Discount & Shipping, Tax, Invoice number, Dates and Notes.
Click ‘Save‘ to save your changes.
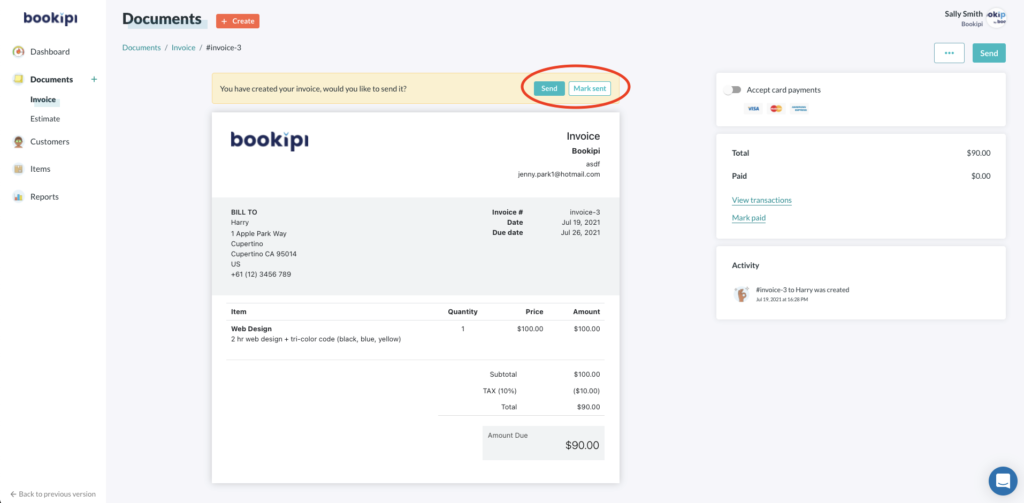
Step 7: Check that all invoice information is correct.
Select ‘Send‘ OR you can manually mark the invoice as ‘Sent’.
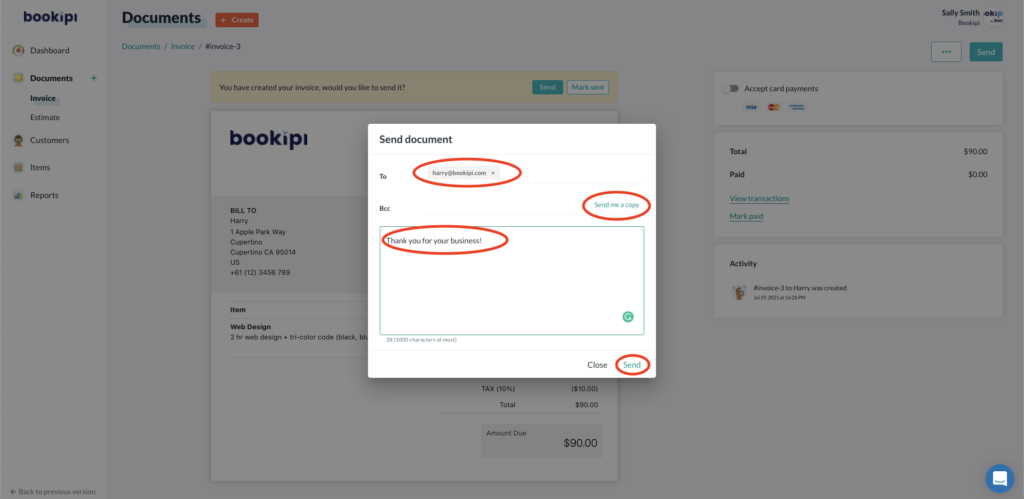
Step 8: Check your customer's email address.
You can copy yourself into the email and write a personalized note to your customers.
Press ‘Send’ to send the invoice via email.
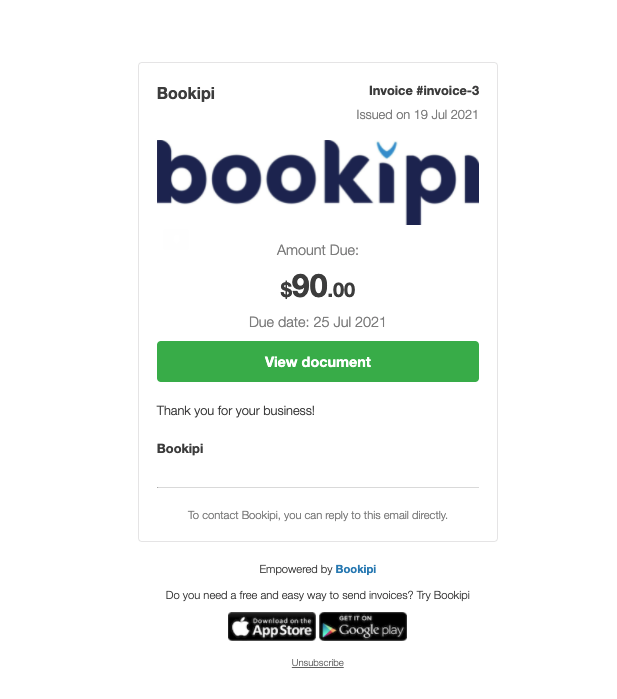
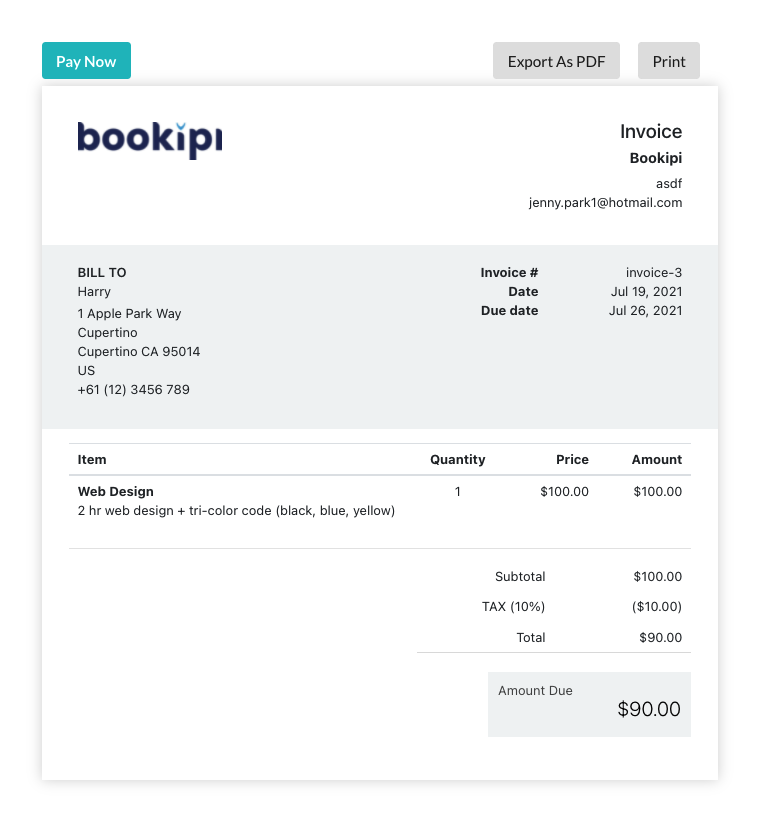
Your customer will receive an email similar to the one below:
Getting paid with Bookipi card payments
Your customers can also pay you directly from their invoice with the ‘pay now’ button.
Your customers can also export the invoice as a PDF document or print out a hard copy.
How to edit an invoice
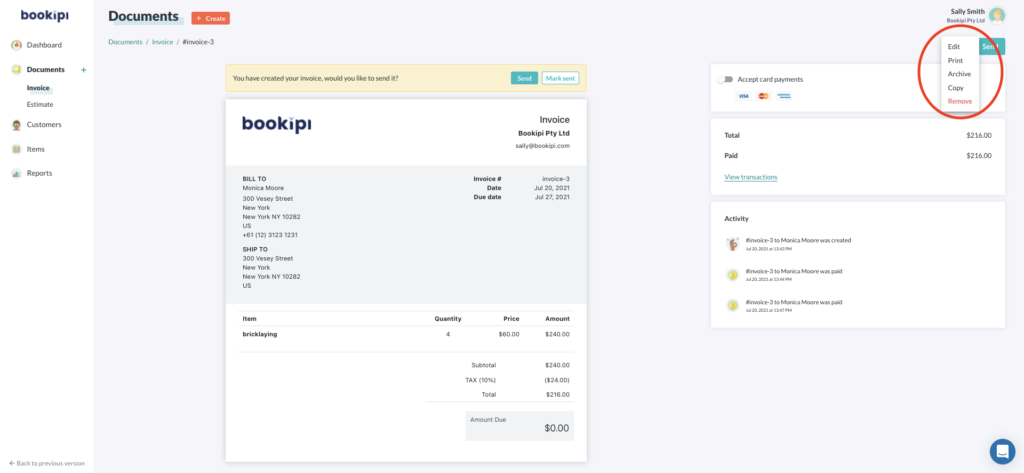
Step 1: Select ‘Invoice‘.
Click on the invoice you would like to edit. Alternatively, select the invoice directly from the dashboard.

Step 2: Select the three dots
You will be able to select whether to edit, print, archive, copy or remove the invoice.
Step 3: Select ‘Edit‘ to make your changes.
Click ‘Save‘ to save your changes.
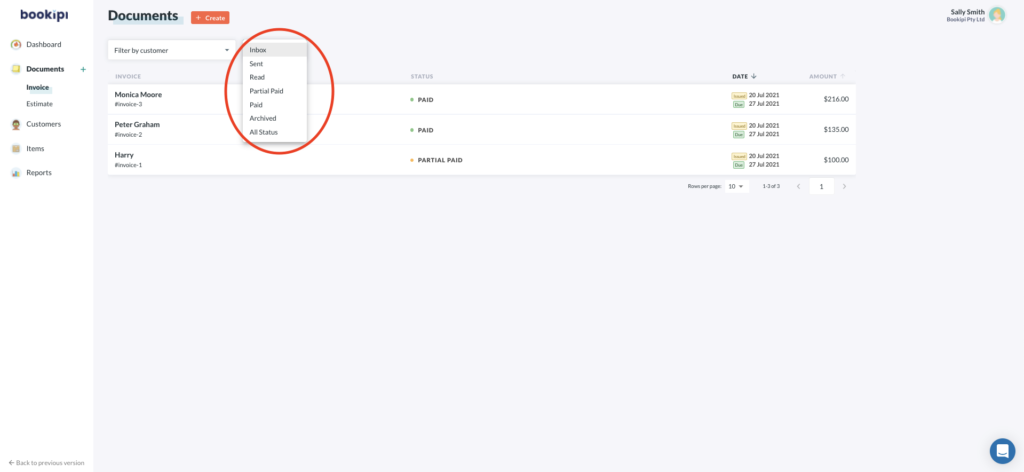
How to sort and filter invoices
You can filter invoices by customer or by status in Bookipi web app.
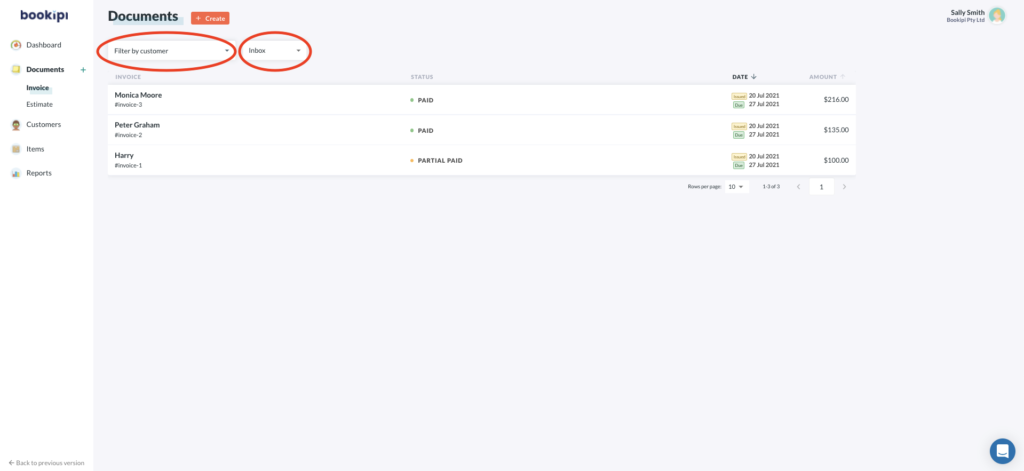
When filtering by status, you can filter your invoices by inbox, sent, read, partial paid, paid, archived, and all.